Saturday, July 31, 2010
Thursday, July 29, 2010
Wednesday, July 28, 2010
Monday, July 26, 2010
Read more: How to Make an Animation Using GIMP Freeware | eHow.com http://webcache.googleusercontent.com/search?q=cache:L7NMHhvclOwJ:www.ehow.com/how_2173141_animation-using-gimp-freeware.html+how+to+create+a+text+animation+steps+free+download&cd=9&hl=en&ct=clnk&gl=in#ixzz0unlG1eWb

Open your saved file in GIMP. The accompanying image is a five-candle candelabra that we created specifically for using as an image for home movie titles.

Under the FILTERS menu, select ANIMATION and WAVES to open up the waves control panel. Notice you can choose the amount of frames for your animation. More frames will create a longer animation. Since we can eventually change the timing of this animation in our video editing program, we selected 10 frames. This will create a relatively short sequence. We can also adjust the amplitude and wavelength for the animation. You can experiment with these to change the nature of the wave.

Once you click OK, the program will begin rendering. When it is finished you will see a still image of the effect in the image window. To view the animation, choose FILTERS/ANIMATION and PLAYBACK

Since we want to make this into a movie title, we want to add some text. Add the text AFTER creating the animation otherwise your text will also be wavy. Select the Text tool and click on the image where you want to insert the text.

Select color and font, color and other text attributes as you would when adding text to any image. In this case, we wanted the font color to come close to the color of the candlelight.

The image is now the way we want it with the text in the proper place for the final frame.

To save the image, select SAVE AS from the FILE menu. Expand the file types. There are a couple of animation types to choose from. We will save this as a GIF animation and therefore select GIF from the file type menu.

Once you click EXPORT you will get another dialog box. You MUST choose SAVE AS ANIMATION or you will only save a still image. You can preview your final image by just double-clicking on the saved file.
Read more: How to Make an Animation Using GIMP Freeware | eHow.com http://webcache.googleusercontent.com/search?q=cache:L7NMHhvclOwJ:www.ehow.com/how_2173141_animation-using-gimp-freeware.html+how+to+create+a+text+animation+steps+free+download&cd=9&hl=en&ct=clnk&gl=in#ixzz0unlG1eWb
Sunday, July 25, 2010
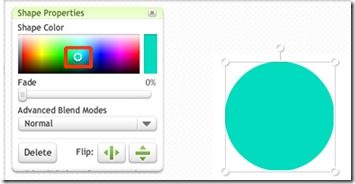
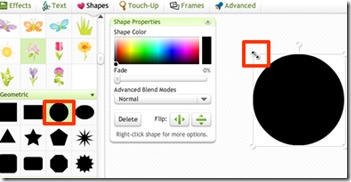 Once inside the “Create” tab, the button you will use the most will be “Shapes.” (If you want to add text to your clip art, you’ll also eventually want to use the “Text” button too.) To begin designing your own clip art, choose “Shapes” and then scroll to see all the available images on the left. Keep in mind that all the images in black can be altered to appear in any color, so at this point all you’ll care about is choosing a shape. Click on an image to insert the shape onto your white “canvas” .jpg, then drag the corner with your mouse to make it the size you want. (See the image above.)
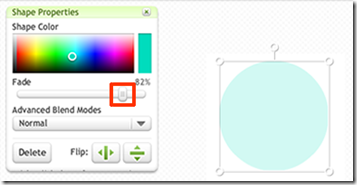
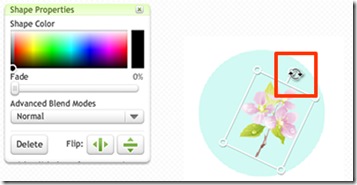
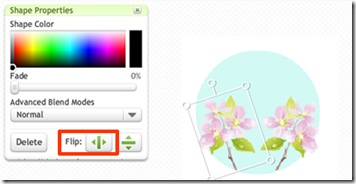
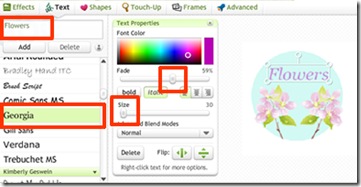
There are a variety of Picnik features you can use to alter your clip art. They require a little getting used to, but once you’re familiar, you’ll probably love playing with them. Here are some of the main features:
Sunday, July 18, 2010

The world of Disney probably was a place of wonder for many people when they were young. The famous and iconic comic characters such as Mickey Mouse and Donald Duck are amongst some of the adorable companions that you grew up with in your childhood. If you are a loyal fan of these cartoon characters and want to immerse yourself again in the magic world of Disney
