Wednesday, June 30, 2010
Tuesday, June 29, 2010
Sunday, June 27, 2010
Friday, June 25, 2010

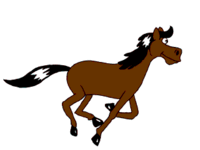
A horse animated by rotoscoping from Eadweard Muybridge's 19th century photos. The animation consists of 8 drawings, which are "looped", i.e. repeated over and over
Tuesday, June 22, 2010

 Betty Boop in The Old Man of the Mountain
 This Talkartoon animation by Max Fleischer was created in 1933.
The cartoon features Cab Calloway playing "Minnie the Moocher" in this 15th Betty Boop animation. Cab sings the title "The Old Man of the Mountain."
The Old Man of the Mountain is also known as the Great Stone Face or the Profile. It was a series of five granite cliff ledges on Cannon Mountain in the White Mountains of New Hampshire, USA. When viewed from the correct angle, they appeared to be the jagged profile of a faces
This classic Betty Boop cartoon was produced in 1932. Music by the Cab Calloway Orchestra.
This cartoon is the 17th in the Talkartoon series. It is probably one of the most popular Betty Boop cartoons produced.
The cartoon starts with a performance of "Prohibition Blues" from the Cab Calloway before he became Cab Calloway and His Orchestra.
"Minnie the Moocher" is from a jazz song first recorded by Cab Calloway and His Orchestra in 1931. It sold over one million copies.
"Minnie the Moocher" is most famous for its nonsensical ad libbed ("scat") lyrics (for example, "Hi De Hi De Hi De Hi").


Betty Boop in  "Minnie the
Moocher" (1932)
This classic Betty Boop cartoon was produced in 1932. Music by the Cab Calloway Orchestra.
This cartoon is the 17th in the Talkartoon series. It is probably one of the most popular Betty Boop cartoons produced.
The cartoon starts with a performance of "Prohibition Blues" from the Cab Calloway before he became Cab Calloway and His Orchestra.
"Minnie the Moocher" is from a jazz song first recorded by Cab Calloway and His Orchestra in 1931. It sold over one million copies.
"Minnie the Moocher" is most famous for its nonsensical ad libbed ("scat") lyrics (for example, "Hi De Hi De Hi De Hi").

EleFun Multimedia released AD Dragon-Fly - the new freeware product in the Animated Desktop Wallpapers series. In this product, we have implemented a perfect combination: excellent picture quality, comparable to a photo, and elements of 3D animation. This product is highly meditative. You will watch the scene of natural life, with the main character – dragon-fly. In the new freeware product displays stony banks of a small creek. A dragon-fly sits still on a stone near the animated water of the creek. Sometimes it moves its wings, but doesn’t feel like flying away. It’s calm and quiet here. The product has a built-in Desktop Manager, making operation fast and effective. Downloading, installing/uninstalling, purchasing company products and other options became available in a single program window.
Monday, June 21, 2010
Sunday, June 20, 2010
Friday, June 18, 2010
Thursday, June 17, 2010
Wednesday, June 16, 2010
Tuesday, June 15, 2010
Friday, June 11, 2010

For a quick hands-on tutorial on creating animated GIFs in Adobe Photoshop, we’ll walk you through creating the following animation:

This simple animation combines the two most common animation techniques in Photoshop: Turning layers off and on, and using the Tween command to animate the movement of an object on a layer.
Step 1: Set up your layers.

The first step in creating any animation in Photoshop is to build a layered Photoshop file with all the elements you plan to animate. Our example document has 7 layers containing the text for our countdown, and layers for the rocket and flame.
You can download our example Photoshop file here:
Step 2: Create Animation Frames with Layer Visibility.

Chose Windows > Animation to show Photoshop’s animation palette.
On the first frame, turn off visibility for all layers you do not want visible at the start of your animation. Then add one frame at a time, and turn on the layers you want visible for each step in the animation.
Changing layer visibility one frame at a time is a classic Photoshop animation technique that covers a wide variety of needs.
In our example, continue this pattern to reveal the countdown and the flame at the bottom of our rocket.
Step 3: Create Animation Frames using Tween.

Now that the countdown is complete, we need to create the illusion that our rocket ship is taking off. Add one more frame, and this time select the group called “Rocket” in layers and move your rocket off the top of your image window.
Then choose “Tween…” from the Animation palette’s pop-out menu.

Set how many frames to add, and Photoshop spreads the movement of your layer across those extra frames.
Step 4: Adjust your Timing.

Finally, go back through and adjust the delay for each frame of your animation. That time is shown in seconds below each frame.
Tip: You can hold down the Shift-key to select a range of frames (such as the 9 frames we added for the rocket’s takeoff) and change them together.
Step 5: Export the Animated GIF.
Finally, to export your animated GIF choose:
In Photoshop CS3: File > Save For Web & Devices…
In Earlier Photoshops: File > Save For Web…

Make sure the image type is set to GIF, feel free to experiment with some of the other options, and save your file.
To test your resulting animated GIF, drag the file onto you web browser.
Thursday, June 10, 2010

Clip Art is traditionally comprised of small images drawn in a stylized, often cartoon-like manner. Usually they are line-drawings with only a few colors used for fill. The images are frequently used as decorative embellishments or accent illustrations for printed advertisements, notices, flyers and short articles. With the advent of computer-generated electronic media, clip art has been adapted to function as the basis for short animated sequences.

Clip Art is traditionally comprised of small images drawn in a stylized, often cartoon-like manner. Usually they are line-drawings with only a few colors used for fill. The images are frequently used as decorative embellishments or accent illustrations for printed advertisements, notices, flyers and short articles. With the advent of computer-generated electronic media, clip art has been adapted to function as the basis for short animated sequences.
Tuesday, June 8, 2010
Monday, June 7, 2010


Open a new document in Photoshop. The document size can be set at 3 inches square or smaller, at a resolution of 96 pixels per inch. In this example the size is only 0.64 inches high by 0.5 inches wide.
- Step 2
Open the Layers panel and either draw your clip art image or place an image on the first layer. The image should be on a transparent background. Save your document in the .psd (Photoshop file) format.
- Step 3
 Layered Images
Draw a series of ten successive images that follow the sequence of animation that you wish to portray. In this example, a flag, rippling as it waves in the breeze, is drawn layer by layer to complete a sequence. The ten layers will each become a frame in the animation, functioning much like the frames of a cartoon film, each layer depicting a step in the sequence of motion.
- Step 4
 Selecting "Animation"
Select the built-in animation feature in Photoshop by clicking on "Window" in the menu bar at top, then "Animation". The Animation "Timeline" view appears by default, but you will need to switch to the "Frames" view by clicking on the small options icon in the lower-right corner of the Timeline bar and selecting "Frames". When the Frames view is displayed, proceed to the next step.
- Step 5
Look at the Frames view, which appears as an elongated bar with a single small image, in a frame. A thumbnail image of the last layer you created is visible in the first frame. In the layers panel, click on the eye icons to turn off the visibility of each of the layers except the first layer, which you want to remain visible in the first animation frame.
- Step 6
 Set Duration
Set the duration of your first frame to 0.15 seconds by clicking on the numbers directly below the thumbnail image of the frame. A panel will appear with pre-set options. Select the "Other" option and type in 0.15 seconds.
- Step 7
 Duplicating Frame
Duplicate the first frame by clicking on the small icon of a turning page on the bar below the frames display area. Then turn off the visibility of the first layer of your Photoshop file and turn on the visibility of the second layer of the Photoshop file. Notice that the time duration of the frame is copied automatically as well. Continue duplicating frames and turning on the layer visibility for each of the corresponding layers to each frame in the sequence until you have a frame for each of the ten layers. Ensure that there is only one layer with the visibility turned on per frame.
- Step 8
 Loop "Forever"
Set the display frequency or "looping" of your animation to "Forever" by clicking on the setting in the lower left corner of the Animation Strip that reads "Once" in the default mode. Clicking on "Once" will display a drop-down menu. Click on the "Forever" setting. This selection will continuously play your animation in a loop, restarting it after every run. The looping will run as long as the page with your animation is open.
- Step 9
 Saving GIF
Test your animation by clicking on the small arrow icon in the middle of the bar below the animation strip. Click on the square icon to stop at any time. If your animation is running properly, it is time to save it as an animated GIF file. Click on "File" from the menu bar at top, then "Save For Web and Devices". A panel will appear with various options and settings. Select GIF file from the option box in the middle of the right side. Use the default settings, which work fine for most purposes. Then save the file to a folder or location of your choice. Your animation is ready to roll.
Sunday, June 6, 2010
Friday, June 4, 2010

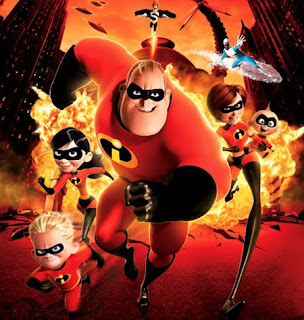
The Incredibles from Pixar Animations Studio (Makers of Toy Story, Finding Nemo, etc) is one of the most entertaing films for young and older audiences.
The look and aesthetics are impressive, it’s well directed, the plot strong and the themes significant.
From IMDB:
Mr. Incredible is a superhero; or he used to be, until a surge of lawsuits against superheroes submitted by the people they’ve saved forced the government to hide them in witness protection programs so they could lead normal, anonymous lives. Now known exclusively by his secret identity, Bob Parr, he lives with his wife Helen, formerly Elastigirl, and their three children Violet, Dash, and Jack Jack. He works as an insurance claims specialist, and he’s fed up with his pushy boss and his immoral profession, but his wife’s worked too hard to build a normal life for her family to abide his nostalgia for heroism. When Mr. Incredible’s offered the chance to play the role of hero again by a mysterious informant, he jumps at the opportunity, but when it turns out to be a trap set by an old nemesis he had a hand in corrupting, the whole family must reveal themselves to save Mr. Incredible and countless innocents.


.gif)


